macos
app
adrive
applite
bilibili
charles
clash-verge-rev
douyin
drawio
font-maple-mono
font-maple-mono-nf
font-maple-mono-nf-cn
fsnotes
google-chrome
handbrake-app
iina
imageoptim
iterm2
jordanbaird-ice
keka
logseq
losslesscut
markedit
onyx
qq
rectangle
sequel-ace
snipaste
sourcetree
squirrel-app
switchhosts
tencent-lemon
tencent-meeting
thunder
wechat
zed
截图
flameshot
直接github下载或者homebrew安装
snowshot
直接github下载或者homebrew安装
sublime text 4200
注册
cd "/Applications/Sublime Text.app/Contents/MacOS/" || exit
md5 -q sublime_text | grep -i "B07FDB3A228A46DF1CC178FE60B64D3B" || exit
echo 01060C90: E0 03 1F AA C0 03 5F D6 | xxd -r - sublime_text
echo 00FEAD18: 1F 20 03 D5             | xxd -r - sublime_text
echo 00FEAD2C: 1F 20 03 D5             | xxd -r - sublime_text
echo 01061F28: C0 03 5F D6             | xxd -r - sublime_text
echo 01060908: C0 03 5F D6             | xxd -r - sublime_text
echo 00FE5780: C0 03 5F D6             | xxd -r - sublime_text

codesign --force --deep --sign - "/Applications/Sublime Text.app"
插件
pretty json rest client
vscodium
{
    "editor.fontSize": 16,
    "rest-client.enableTelemetry": false,
    "rest-client.previewOption": "exchange",
    "rest-client.environmentVariables": {
        "$shared": {},
        "dev":{
            "host":"http://127.0.0.1:8080"
        }
    },
    "diffEditor.renderSideBySide": false,
    "git.confirmSync": false,
    "git.autofetch": true,
    "markdown-editor.imageSaveFolder": "${projectRoot}/docs/assets/images"
}
鼠须管配置
# squirrel.custom.yaml
patch:
  # --- 1. 核心视觉逻辑 ---
  "style/color_scheme": macos_light           # 指定系统【浅色模式】下的皮肤方案
  "style/color_scheme_dark": macos_dark      # 指定系统【深色模式】下的皮肤方案(0.15+版本自动切换)
  "style/candidate_list_layout": linear      # 现代线性布局:相比 horizontal,间距控制更自然
  "style/font_face": "SF Pro, PingFang SC"   # 字体:SF Pro 渲染数字英文字符,平方渲染汉字,最强原生感
  "style/font_point": 24                     # 候选词字号大小
  "style/label_font_point": 15               # 序号字号大小:略小于候选词,视觉重心更突出

  # --- 2. 原生质感微调 ---
  "style/corner_radius": 10                  # 整个输入框的外圆角半径
  "style/hilited_corner_radius": 6           # 选中项(蓝色胶囊)的内圆角半径
  "style/hilited_padding": 4                 # 选中项文字与高亮背景块之间的留白(呼吸感关键)
  "style/border_height": 6                   # 输入框上下内边距
  "style/border_width": 10                   # 输入框左右内边距
  "style/line_spacing": 6                    # 多行候选时的行间距(linear布局下影响不大)
  "style/spacing": 12                        # 编码区(拼音)与候选词区之间的间距

  # --- 3. 皮肤方案具体定义 ---
  preset_color_schemes:
    # 浅色原生方案
    macos_light:
      name: "原生浅色"
      back_color: 0xF2F2F2                   # 背景色:BGR格式的浅灰色
      text_color: 0x424242                   # 输入码(拼音)颜色:深灰,区分于候选词
      candidate_text_color: 0x000000         # 候选项文字颜色:纯黑
      hilited_text_color: 0xFFFFFF           # 选中项文字颜色:纯白
      hilited_back_color: 0xD77800           # 选中项背景色:苹果标志性蓝色
      border_color: 0xFFFFFF                 # 边框颜色:白色边框在浅色下更有质感

    # 深色原生方案
    macos_dark:
      name: "原生深色"
      back_color: 0x2D2D2D                   # 背景色:深灰色
      text_color: 0x999999                   # 输入码(拼音)颜色:淡灰
      candidate_text_color: 0xFFFFFF         # 候选项文字颜色:纯白
      hilited_text_color: 0xFFFFFF           # 选中项文字颜色:纯白
      hilited_back_color: 0xD77800           # 选中项背景色:苹果蓝
      border_color: 0x000000                 # 边框颜色:纯黑,与深色模式融为一体
# rime_ice.schema.yaml
__include: octagram   #启用语法模型
# 语法模型
octagram:
  __patch:
    grammar:
      language: wanxiang-lts-zh-hans
      collocation_max_length: 6
      collocation_min_length: 3
      collocation_penalty: -10
      non_collocation_penalty: -20
      weak_collocation_penalty: -45
      rear_penalty: -12
    translator/contextual_suggestions: false
    translator/max_homophones: 5
    translator/max_homographs: 5
开发工具
操作系统,最稳定版本推荐,选择逻辑 macOS 15 (Sequoia),2024.2.6,属于该系统生命周期内的“完全体”,Bug 最少,插件最稳。 macOS 26 (Tahoe),2024.3.7,属于针对新系统的“救火版”,修复了新系统特有的黑屏和卡顿。
屏蔽更新
锁定最大系统版本
sudo defaults write /Library/Preferences/com.apple.SoftwareUpdate \
    TargetReleaseVersion -int 15
mac自启动设置
以nginx为例
1.编辑启动配置文件
sudo vim /Library/LaunchDaemons/com.nginx.plist加入
<?xml version="1.0" encoding="UTF-8"?>
<!DOCTYPE plist PUBLIC "-//Apple Computer//DTD PLIST 1.0//EN" "http://www.apple.com/DTDs/PropertyList-1.0.dtd">
<plist version="1.0">
<dict>
        <key>Label</key>
        <string>com.nginx.plist</string>
        <key>ProgramArguments</key>
        <array>
                <string>/usr/local/nginx/sbin/nginx</string>
        </array>
        <key>KeepAlive</key>
        <false/>
        <key>RunAtLoad</key>
        <true/>
        <key>StandardErrorPath</key>
        <string>/usr/local/nginx/logs/error.log</string>
        <key>StandardOutPath</key>
        <string>/usr/local/nginx/logs/access.log</string>
</dict>
</plist>
2.修改权限
sudo chmod 644 /Library/LaunchDaemons/com.nginx.plist
3.注册为系统服务
sudo launchctl load -w /Library/LaunchDaemons/com.nginx.plist
卸载为sudo launchctl unload -w /Library/LaunchDaemons/com.nginx.plist
软件询问是否接入网络的解决办法
对于Mac下程序始终询问是否接入网络问题的解决办法
- 关闭程序;
- 修改防火墙,把相关程序从防火墙的白名单中删除;
- 删除~/Library/Preferences/com.该程序名.plist文件。 到次即可,重启程序后会新建相关文件并自动修改防火墙中相关内容,该问题已解决。
homebrew
# show a list of all your installed Homebrew packages
brew list
# It will pin the formula to the current version
brew pin <formula>
换源
export HOMEBREW_BREW_GIT_REMOTE="https://mirrors.ustc.edu.cn/brew.git"
export HOMEBREW_CORE_GIT_REMOTE="https://mirrors.ustc.edu.cn/homebrew-core.git"
export HOMEBREW_BOTTLE_DOMAIN="https://mirrors.ustc.edu.cn/homebrew-bottles"
export HOMEBREW_API_DOMAIN="https://mirrors.ustc.edu.cn/homebrew-bottles/api"
maven报错
The JAVA_HOME environment variable is not defined correctly
解决办法:
# On macOS 10.15 Catalina and later, the default Terminal shell is zsh. For the zsh shell, we can put the environment variables at ~/.zshenv or ~/.zshrc.
export JAVA_HOME=$(/usr/libexec/java_home)
# Before macOS 10.15 Catalina, the default Termina shell is bash. For the bash shell, we can put the environment variables at ~/.bash_profile or ~/.bashrc.
export JAVA_HOME=$(/usr/libexec/java_home)
飞塔vpn开源替代方案
安装openfortivpn
brew install openfortivpn
编辑config文件/usr/local/etc/openfortivpn/openfortivpn/config
host = xxx
username = xxx
password = xxx
trusted-cert = xxx
登录vpn
sudo openfortivpn
charles抓包配置
- 安装charles
- 电脑上安装证书
help>SSL Proxying>Install Charles root Certificate - 手机上安装证书
help>SSL Proxying>install charles ...................browser - 设置抓包域名点击proxy>SSL Proxying Settings打开如下弹框,勾选ssl代理开关,左侧inclide为需要抓取的代理,填写需要抓取https的host,port里填写443即可,也可以用*号代替
ios安装证书和安卓大致不差,只是比安卓多出了一步,在安装下载完证书时,需要认证:设置—>通用—> 关于本机—>证书信任设置,信任该证书后安装便可抓https请求了。
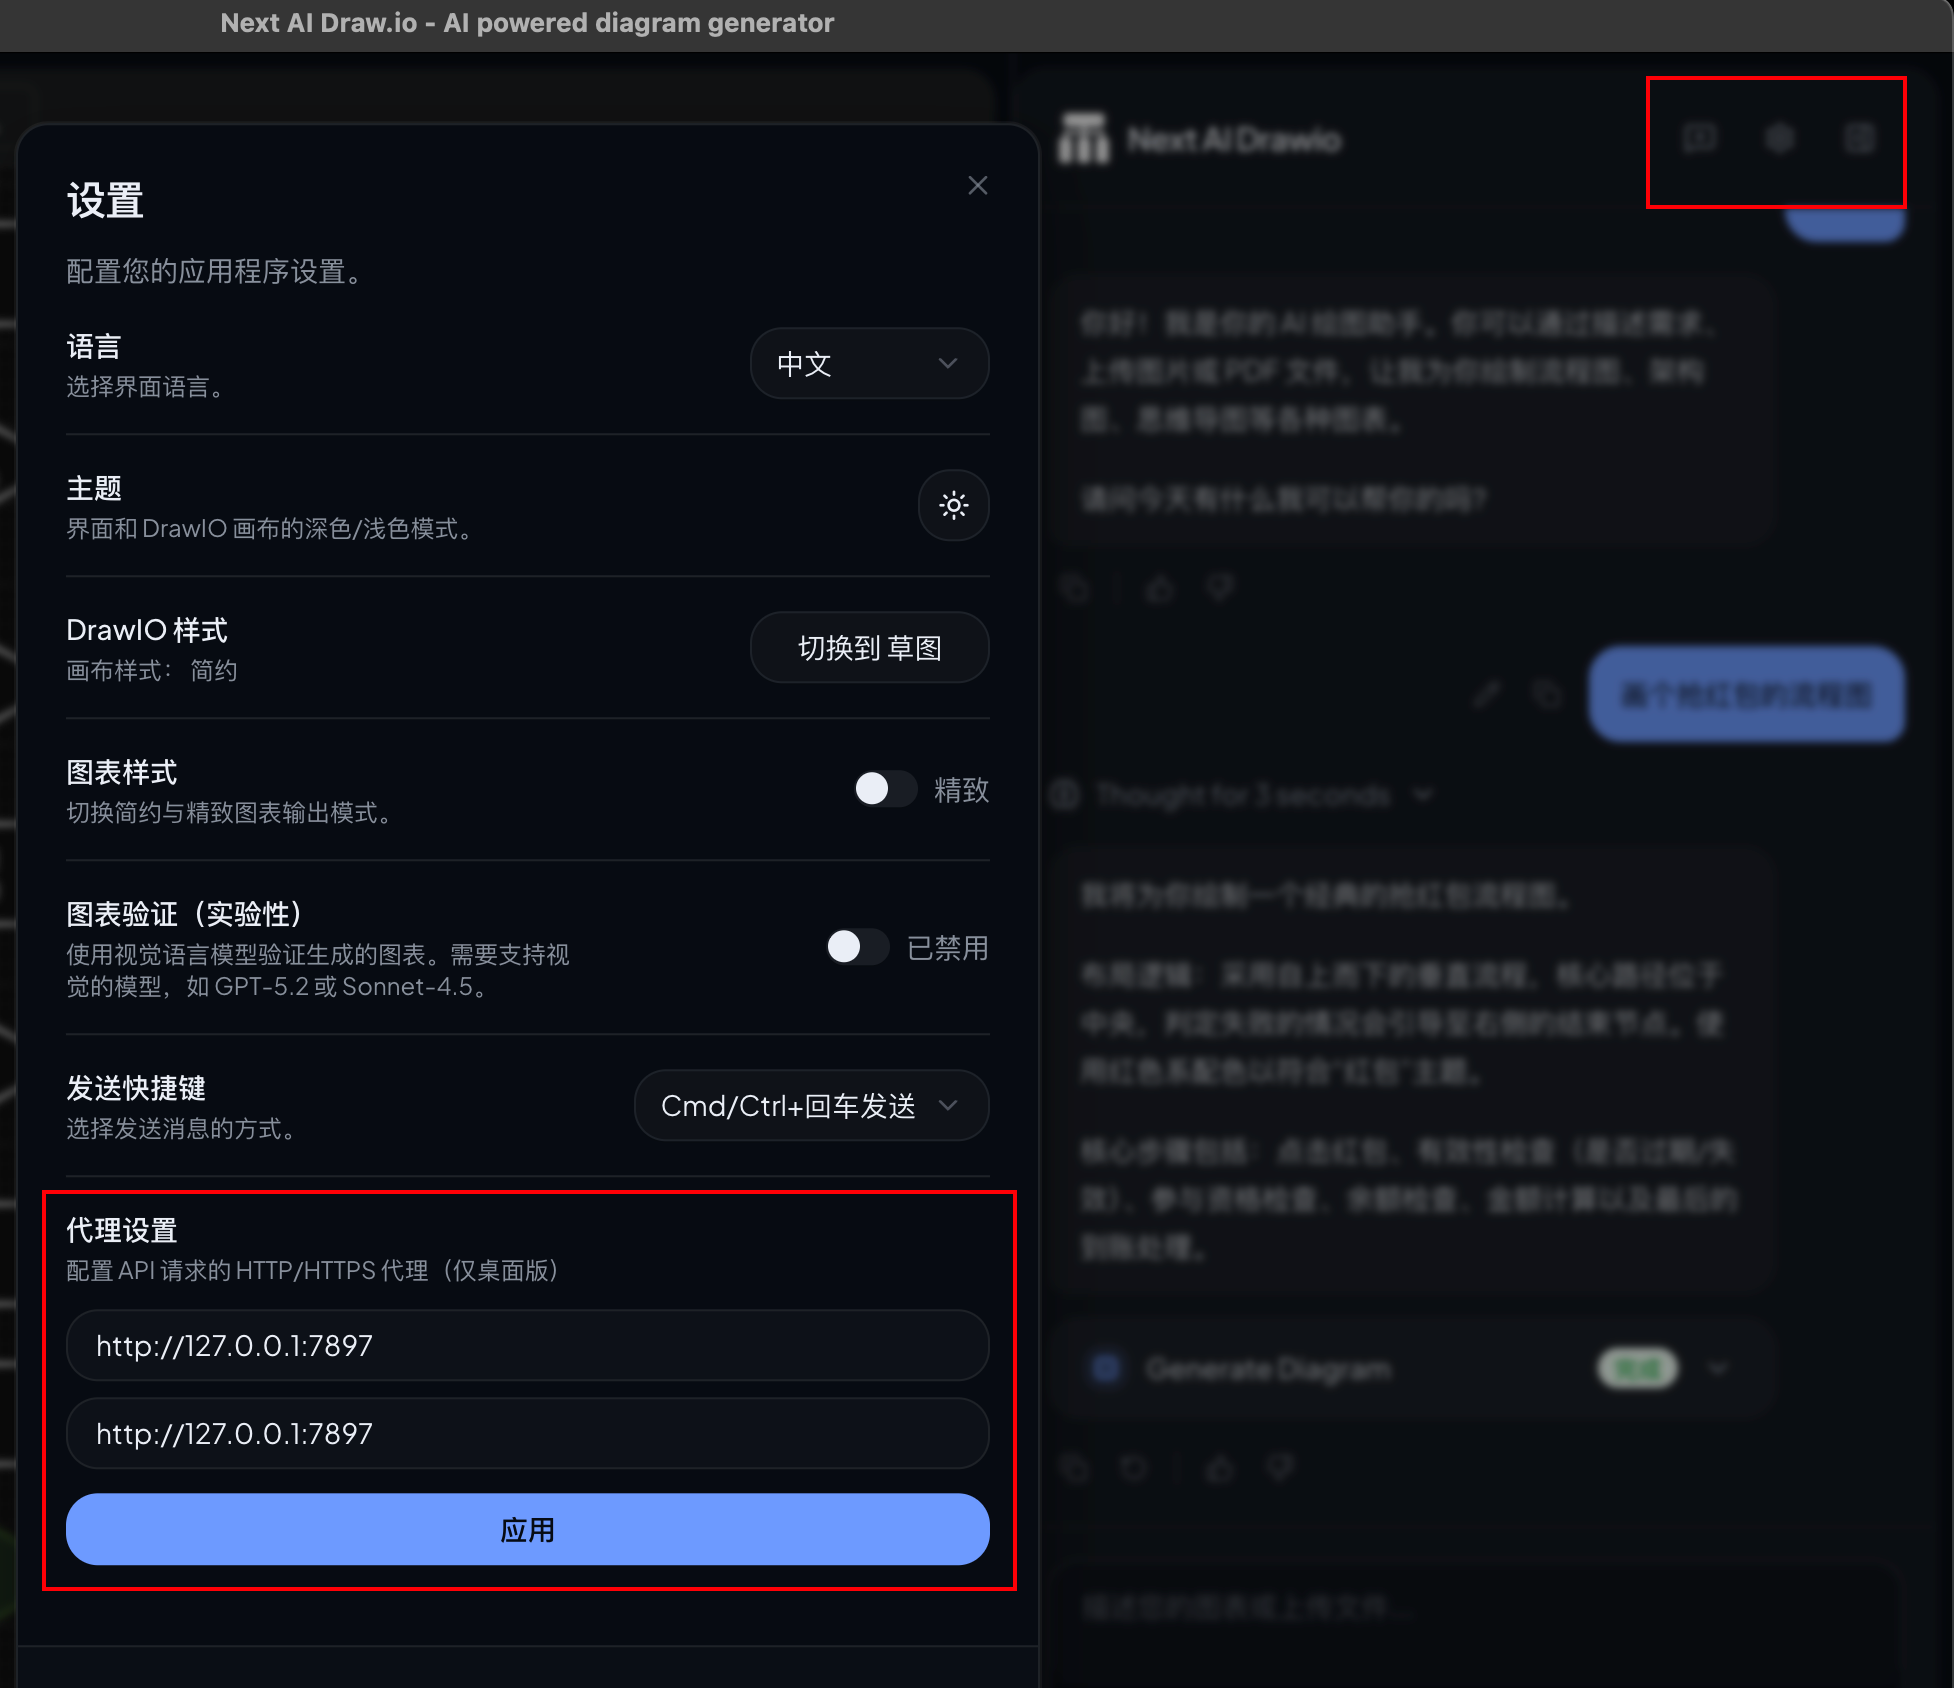
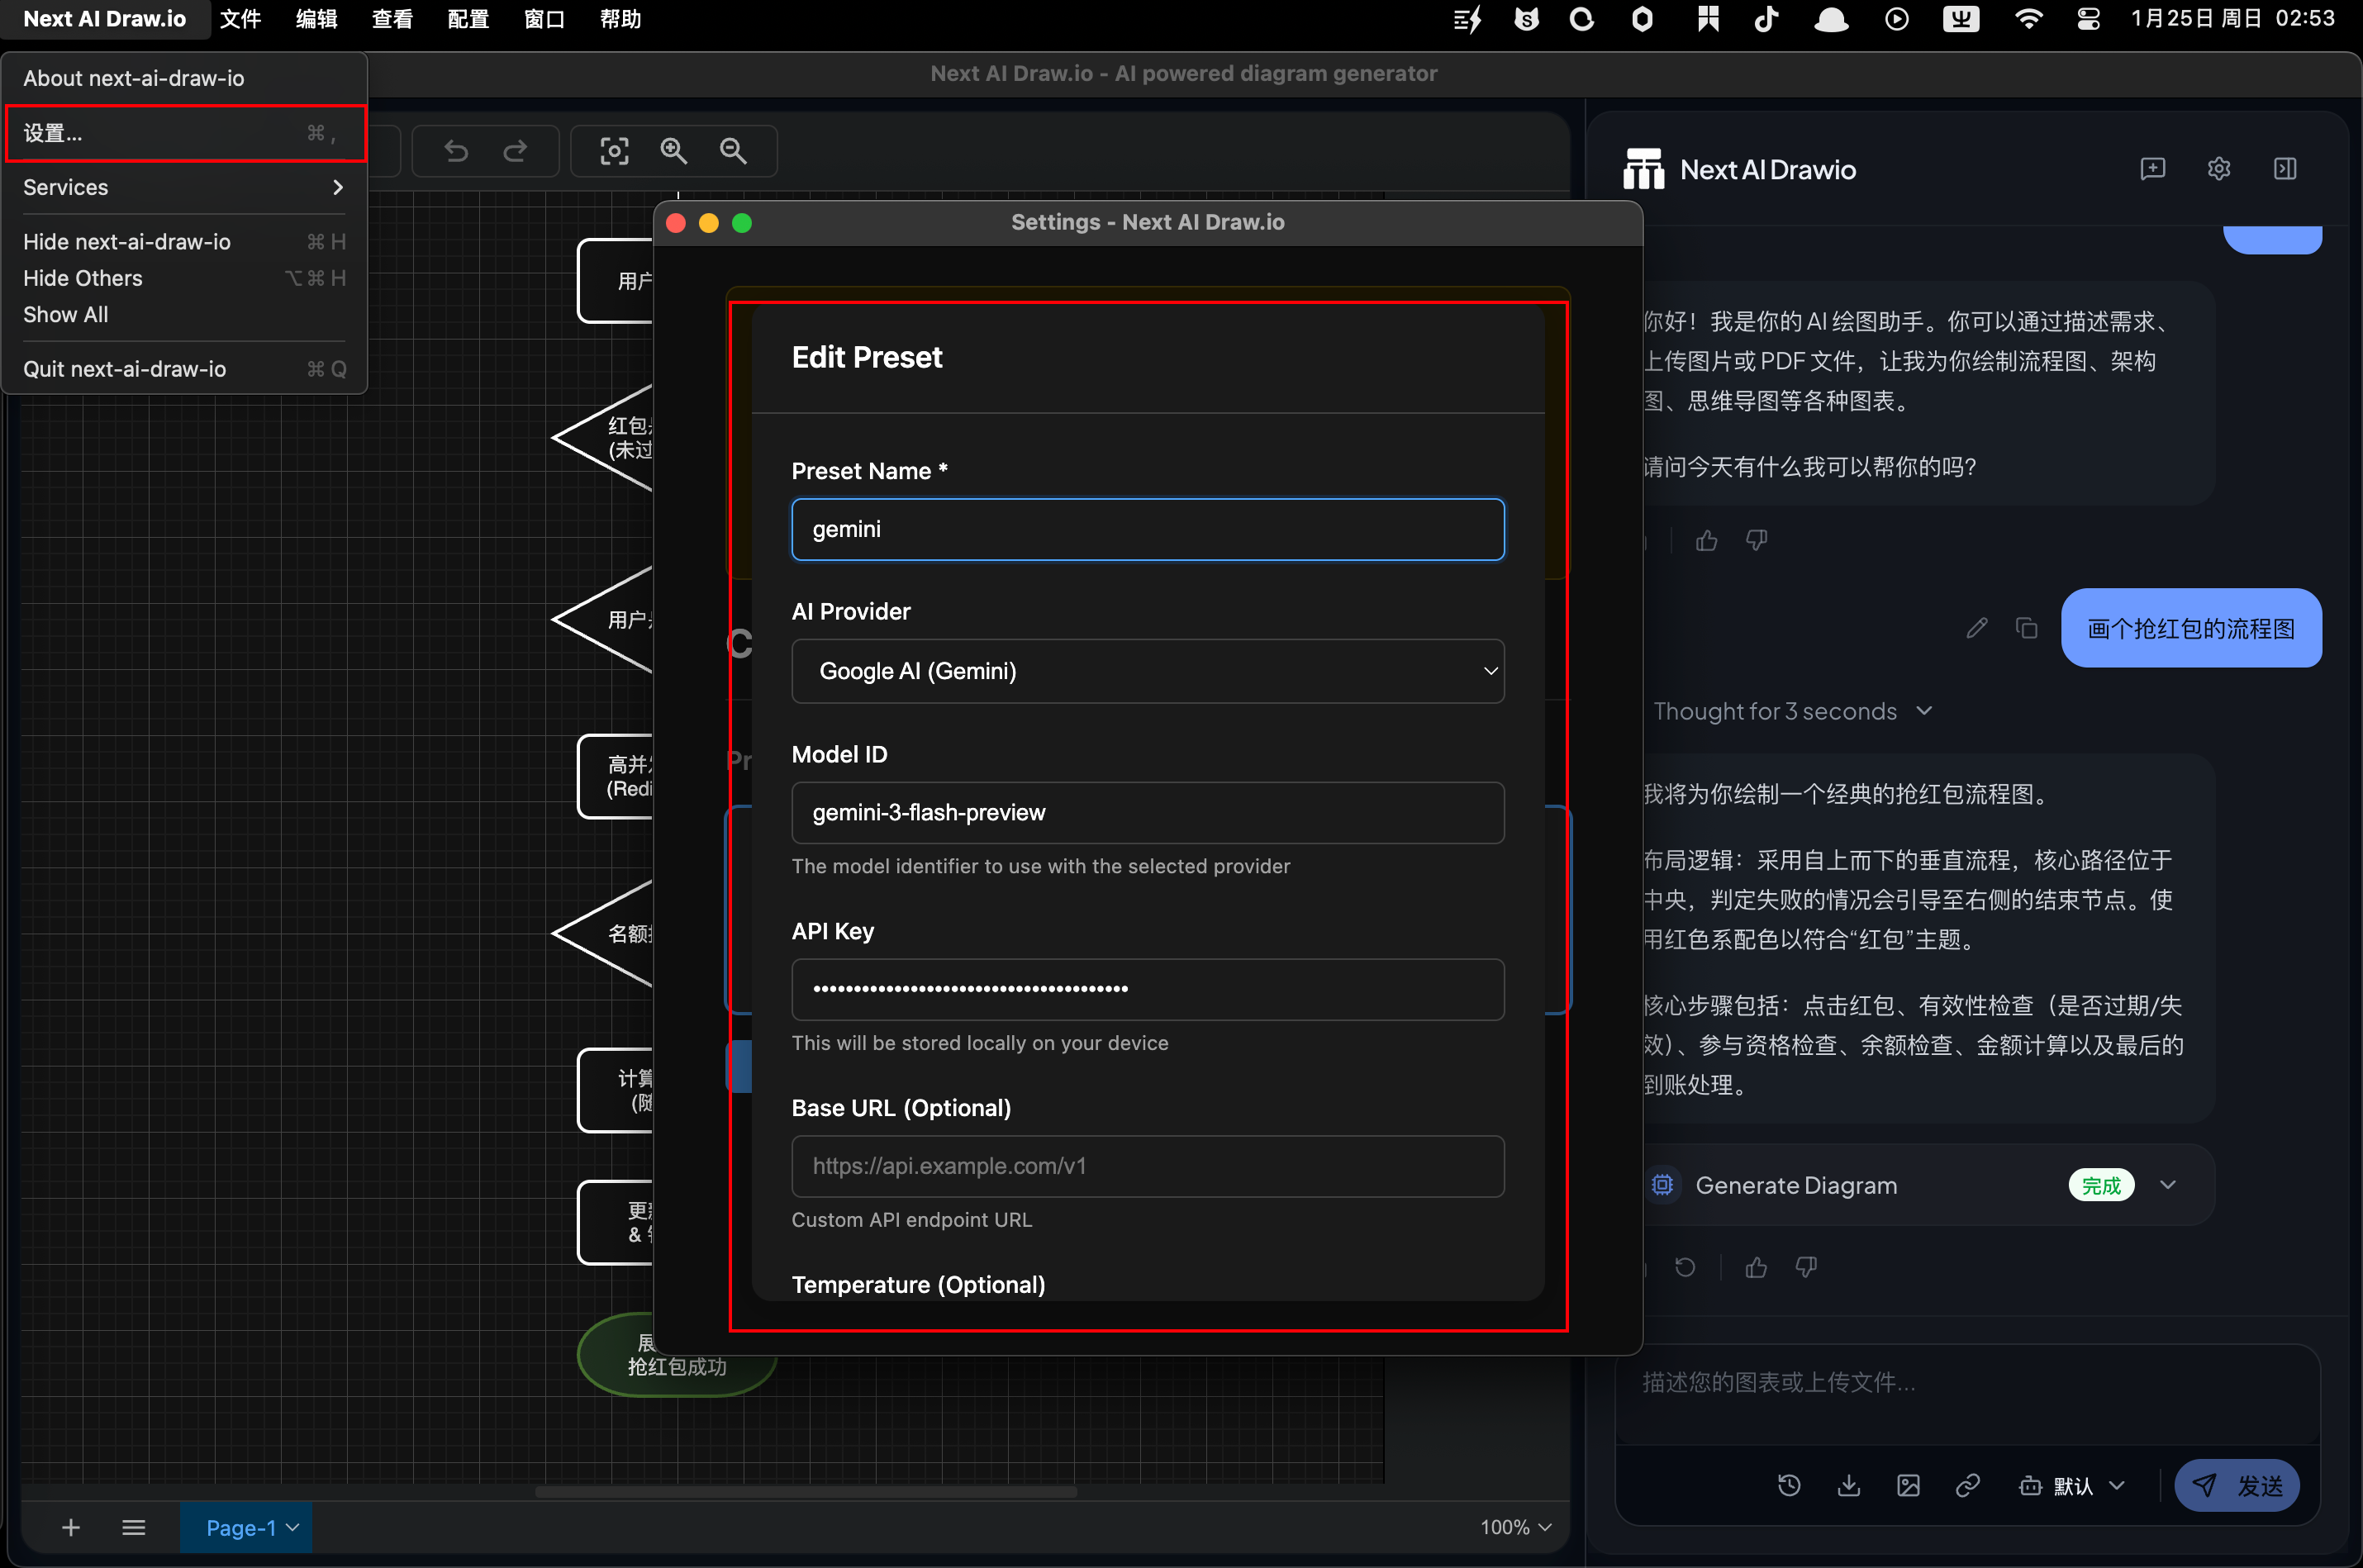
next-ai-draw.io
next-ai-draw.io ai配置
next-ai-draw.io 代理配置